Thursday, August 22, 2013

Damaged Film, or Cool Pictures?

Is this a "lost" image?
Recently I took a trip to Glacier National Park with some of my closer Couchsurfing friends and as any self-respecting experimental-analog photographer, I brought my two Holgas. One was fitted with the usual 120mm film, and the second one was fitted with a 35mm roll (in the near-ish future I will dedicate a blog post about how to do this with an average Holga). It's always good to have handy two analog cameras in case what happened to me, happens to you! 

So I was on the road when I fitted in my 120mm film roll into my Holga and had forgotten to bring black tape, or any tape for that matter, with me. When you are using a "toy" camera such as a Holga, it is virtually REQUIRED for you to tape up the sides and openings that are potential "catastrophe makers" and sources of light leaks. In my usual good practice, I always tape up the back of my camera so that not only is it taped shut, but also light-leak proof.  However, I decided to risk it this time and just went with the usual Holga "lock" (if it can be called that) and prayed for the best. Everything went fine, I took pictures of amazing landscapes and was having the time of my life for that week up in the Rocky Mountains surrounded by melting glaciers. Until the last day of the trip, I was unpacking my backpack and picked out my Holga to realize to my dismay that the "lock" had unlocked and the back was cracked open. When I saw this, my first words were... (substitute "p's" for "t's" here) "ship, ship, ship..." amongst other random objects such as "puck," and "trap"...

A week later, when I went over to my Chicago Lomography store I gave the shop owner my roll honestly expecting the worst (lost roll). I was comforted, however, when she told me they'd give me a free roll of film (or something like that) if my film got messed up. So went ahead and sent it out. To my surprise, when the roll came back to me developed, the pictures were there! Yes, I was right, light leaked and did its damage. But, man, it was some pretty cool damage. So I took the digitalized pictures and tweaked their contrast/saturation a little bit on my iPad and got the following pics. See for yourself!
View From Slide Lake (Lovingly Called "V" Lake)


Grinnell Glacier Melting (This one I added some color with an extra filter)

Glacier Count Down

The Group

Yours Truly

So there you have it. That's the beauty of experimental photography... it's experimental! Errors, horrors, and all of the above are mere opportunities to push your creativity in new directions and discover new styles. So never ever say you've "lost" a pic or two because of light leaks, etc. See this as an opportunity to make it work and enjoy the results!

Sunday, August 4, 2013

Digital iPad Photography

  One of my first Instagram posts

The popularity of Instagram and other quick photo-sharing apps has finally done something that was never before achieved at such a scale by cheap disposable cameras, the original Holgas, or instant Polaroids: True popular photography. Yes, people's photography!

Alright... when you look through Instagram feeds you often see some pretty boring pictures. Pictures of food, pets, selfies, sidewalks, walls, fans, bottles... It can be pretty exhausting looking through these, especially if your feed is filled with pictures of One-Direction from your little cousin's profile--who has an obsession with them. However, the ever-present nature of phone cameras and the like has also given some interesting results. People who before had absolutely no interest in photography can now easily subscribe to a good photographer's feed...and... emulate them! Even more so impressive, people who before knew nothing about taking pictures, fall in love with seeing the world throu a different lens and teach themselves to take amazing photos! It is now easier than ever for non-photographers to embrace photography and become photographers themselves. And I mean, good photographers...

But this post isn't about them. This post is about the devices themselves. I  just wanted to show you some pictures taken with my iPad (a pretty low-resolution camera) that I find are just as interesting as   their analog counterparts. The pictures displayed here were taken using the following photography apps: the native photo app, 360 Panorama, and Snapseed.


A moving Swan taken with iPad
Another picture taken with iPad with no modifications
Dual Lens Citizenship (instagram)


Fooling the 360 function into a faux multiple exposure                            

Some image modifications made with Snapseed                                     
A combination of all programs into one image

Friday, September 14, 2012

Saturday, June 23, 2012

Introspection and the Un-learning of photography. Pinholes, Double-Exposures, and the Holga


"Te quiero, pero me das miedo"


As a photographer, I´m rarely pictured in my images because I´m logically usually behind the camera. Many photographers hide behind their cameras, using the visual-psychological barrier that´s created within the lens to distance themselves from the world they´re capturing. When we put a camera between ourselves and the world, the process of focusing, adjusting apertures, and searching for the perfect angles effectively alienates us from the image we are creating. This alienation makes it easier for us to show our work to others and not feel vulnerable. This way, if it sucks, well, it was the camera, the day, bad juju... If it´s awesome, then cool, let´s make some money out of it. We thus relieve ourselves from the emotional angst that usually accompanies making real art and showing it to the world. 


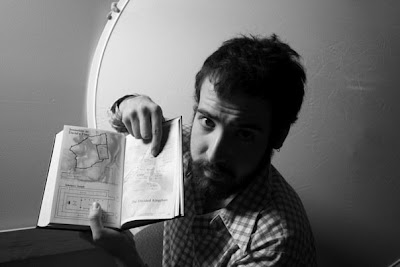
Here´s the story of my life... hope it doesn´t freak you out.


Our art is a part of ourselves, and the minute we show it to others we can feel vulnerable, fragile, as if we were naked in front of all to see. No matter the nature of the art-piece, the message we send to others is usually one we believe in, and commonly one we feel deeply identified with in some way. Thus, if we truly want to create art photography we have to attempt to brake that barrier set by the technicisms of the camera. There are many ways of doing this. An obvious one is to not get lost in the technicisms, just take as many pictures as possible. Especially now addays with the overabundance of Digital SLRs, the photographer truly has nothing to loose by simply taking hundreds of pictures in the moment and then, with some patience, looking over them for the perfect shot. This is in fact what many famous photojournalists do. They don´t sit in front of the event trying to get the perfect focus, aperture, or angle in the moment. If they did this they would never be able to record the most important moments in history. For them, the camera is really an extension of their eyes. It´s only after the event that they can take the time to reflect upon the events and examine for the best image. This is a good approach, but it takes time to let go and loosen up behind the technical camera. It becomes even harder to loosen up when you use film and every picture you take costs... a lot.


Let me show you the way


Therefore, we have alternative photographic processes. There are hundreds of ways of letting go of the technical camera and beginning to un-learn photography so that it is more like art and less like a dull record of space and events. Here, I´m only going to show three of these ways as I explored them when I embarked on the project of eliminating my alienation from the world I viewed behind my lens.

Here´s a little background on my experience with alternative photography: I learned about it in college from my amazing mentor and professor Donald Albrecth. I started my courses with him like your average beginner  photographer, meaning that I took pictures of fairly uninteresting things. Although he never said my pictures were boring (which was important for me!), he did guide me into the telling of stories with pictures. When he critiqued a picture of mine, he would ask, 

  "what is the story behind this? What is there here that tells us this picture is more than just a picture of a       (insert name of inanimate object or person here)?"

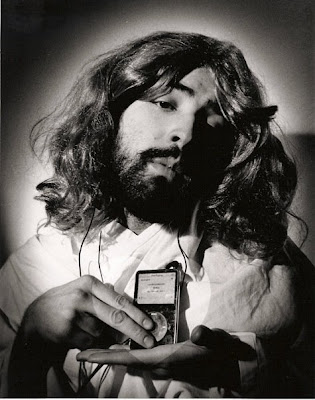
this made approach photography different, and I started attempting to tell stories with my images. I started by dealing with my views on my religious country with my project titled "Where is Jesus?" Then I focused on expressing the way cities and towns felt. these pictures were interesting and they told a much better story than my previous ones. However, I started noticing that my treatement of my subjects was rather artificial and I really wasn´t interested in digging in too deeply into myself for these stories. 

However, during the process of learning alternative photography methods, my father-who raised me-died. Vulnerable, lost, and confused, I attempted to use photography as a medium to make sense of myself, and thus the next few pictures that I will display stem from that. 

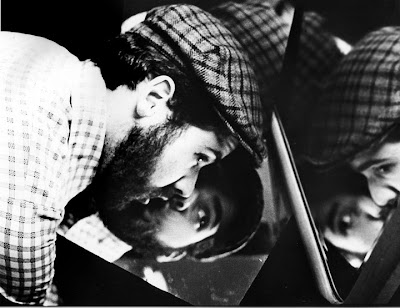
Ghosts (Double Exposure)

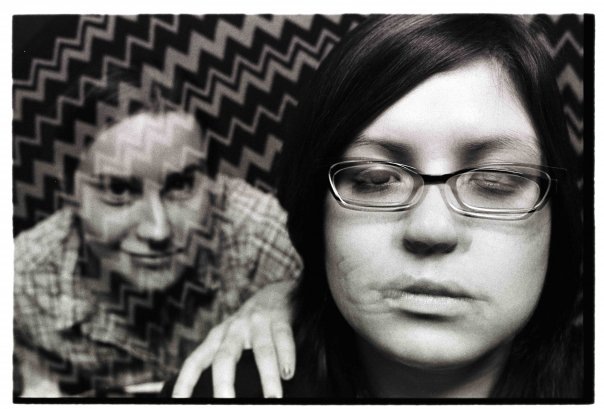
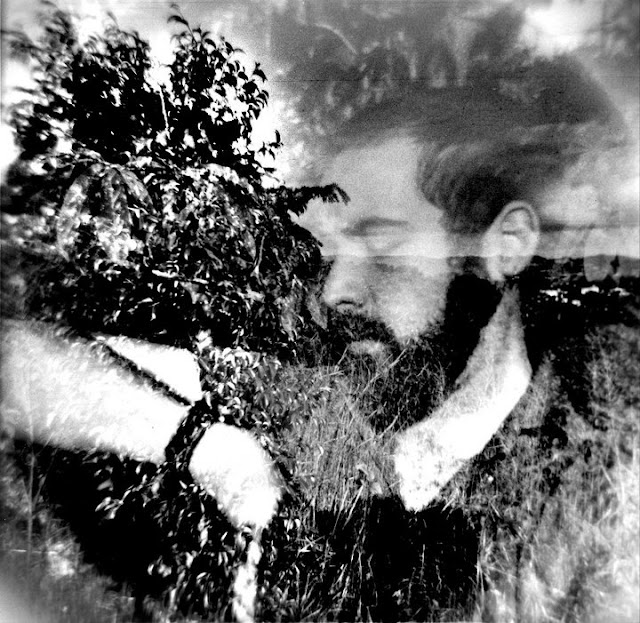
Double Exposures are one of my favorite techniques for telling stories. By exposing the film twice in the same place, you get a "ghost-like" image in front of any other image you have. They way to this varies by camera, but the essential principal to remember is that one cannot let the film roll forward when you want to combine two images un one frame.


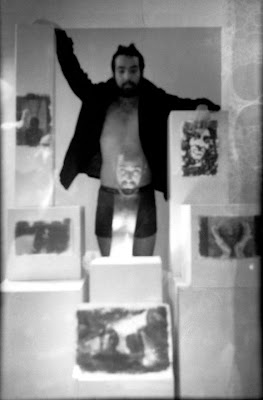
Desde Adentro (Double Exposure)

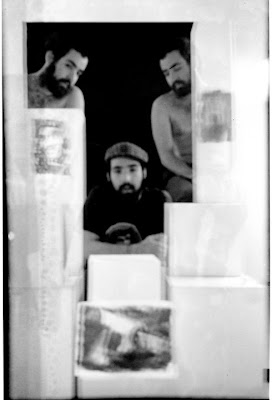
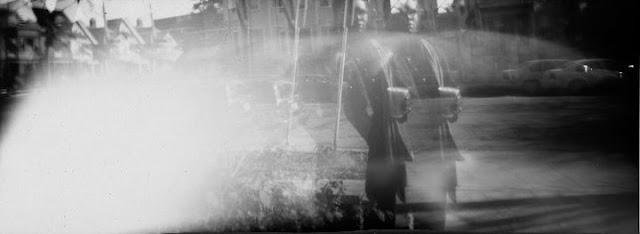
El Juicio (Double Exposure)


If combining pictures is not they way you want to tell your story, then you might consider the pinhole camera if your intent is to have more primal images. Pinholes cameras are the most basic and cheap cameras. You can make them out of pretty much everything. To create them you have to create and almost perfect hole (usually with a pin) that then operates as the "lens" when set up in a camera obcura setting. For my images I used a show box and decided to use two holes instead of just one. The results were interesting indeed...


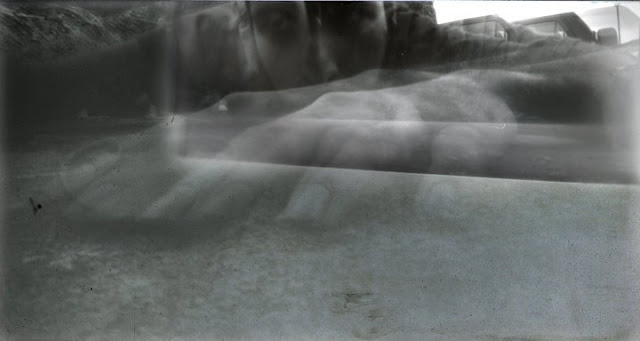
Entra (Shoebox Double Pinhole)

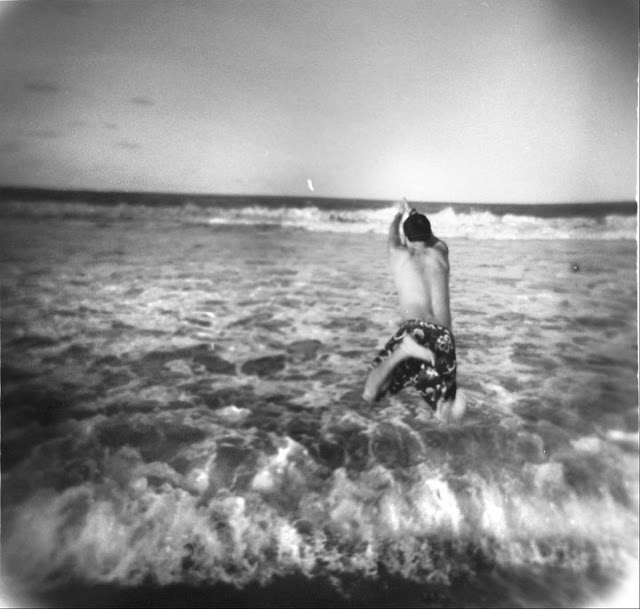
Rest (Shoebox Double Pinhole)

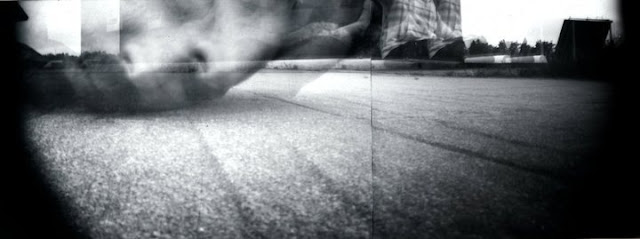
Alexander (Shoebox Double Pinhole)

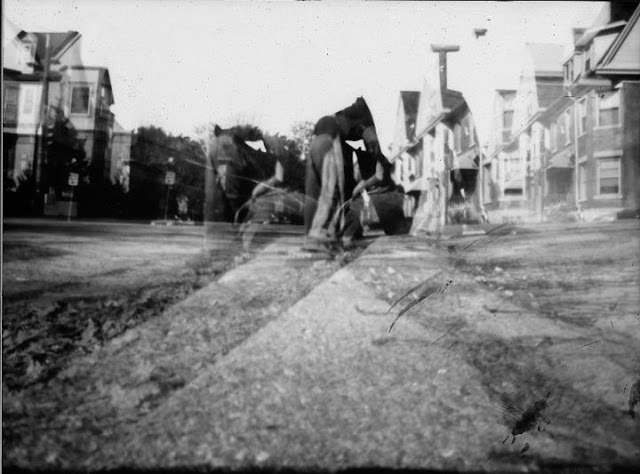
The Curb (Shoebox Double Pinhole)


If you don´t feel like building your own unpredictable camera, then you can buy it! The Holga, an inexpensive plastic camera designed by T.M. Lee in 1981 in China. It gives the photographer a unique opportunity to relieve himself of the technicalities of professional photography and become an amateur again. It´s unpredictableness and defectiveness makes it the perfect tool for the introspective process. It has four focus settings: portrait, nuclear family, ceo group photo-up, and mountains. It also has two appertures: sunny and cloudy. You can never tell how your images are finally going to turn out like until you develop them.

I really like to use the Holga because of it´s ease of use, portableness and also because the images it creates are as close as I can get to a visual record of how I remember places, or people. The imperfections in the camera reflect the imperfections in my memory, and it´s tendency to make everything look beautiful also reflect my tendency to romanticize everything. Thus, it´s an amazing tool!


Pa´ Dentro (Holga)

On Time (Holga Double Exposure)

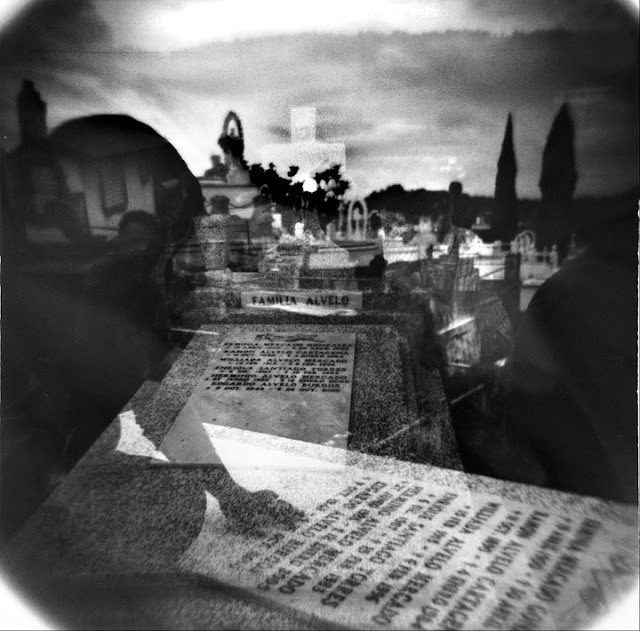
La Familia (Holga Multiple Exposure)


Tuesday, February 15, 2011

Daily Photo 3 & A Little Bit on Photograms

"!" (Photogram)

A LITTLE BIT ON PHOTOGRAMS

A photogram is potentially one of the cheapest ways to make photographic images. All you need is any random object (or objects) you want, some light-sensitive paper, and a good imagination (Plus all the darkroom materials, chemicals, and stuff which cost thousands of dollars--but we're assuming here that you have access to this stuff for free. So, yeah...). Apart from the intrinsically complex nature of composition, photograms are very simple to create images. All you need to do is position objects on top of some light-sensitive surface (such as darkroom photo-paper) and shine light on it. Then, you develop the paper and voila!, you have these images that we're showcasing this week on the blog. 


Here's a little bit of history on the photogram from the famous and sometimes academically infamous wikipedia:

Some of the first known photographic images made were photograms. William Henry Fox Talbot called these photogenic drawings, which he made by placing leaves and pieces of material onto sensitised paper, then leaving them outdoors on a sunny day to expose, making an overall dark background and a white outline of the object used.[3]

From 1843, Anna Atkins produced British Algae: Cyanotype  Impressions in installments, the first book illustrated with photographs. The images were exclusively photograms of botanical specimens. Atkins used Sir John Herschel's cyanotype process, which yields blue images [we will talk about cyanotypes in a future blog].
Photograms were used in the 20th Century by a number of photographers, particularly Man Ray, who called them "rayographs". His style included capitalizing on the stark and unexpected effects of negative imaging, unusual juxtapositions of identifiable objects (such as spoons and pearl necklaces), varying the exposure time given to different objects within a single image, and moving objects as they were exposed. 

Monday, February 14, 2011

Daily Photo 1

This blog will showcase daily, or bi-daily, or at least weekly, an image from photographer Miguel Alvelo.  We'll also post some history (or explanation) on the techniques used behind the images, and the cameras used to produce the images. 
Enjoy, share, and comment.


"Bike Love" (Photogram)


Followers